
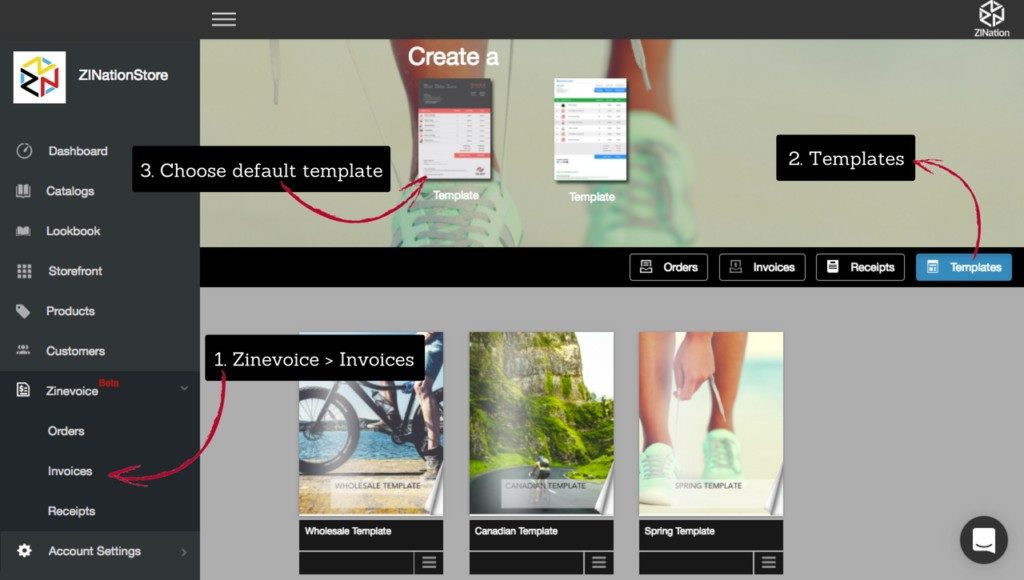
[vc_row][vc_column][vc_single_image image=”16865″ img_size=”full” alignment=”center” css=”.vc_custom_1527145970472{background-position: center !important;background-repeat: no-repeat !important;background-size: cover !important;}”][/vc_column][/vc_row][vc_row][vc_column][vc_single_image image=”16876″ img_size=”614×307″ alignment=”center” style=”vc_box_rounded” onclick=”custom_link” link=”https://about.zination.com/zinevoice-support-videos/”][/vc_column][/vc_row][vc_row wrap_type=”in_container”][vc_column][vc_tta_accordion][vc_tta_section i_icon_fontawesome=”fa fa-paint-brush” title=”How do I create a Custom Template for my Invoices?” tab_id=”1493834700997-585a6c28-f681″ add_icon=”true”][vc_column_text]• From your Dashboard, choose Zinevoice > Invoices from the left menu, then choose Templates at the top right
• Choose one of the default Templates at the top of your page to start
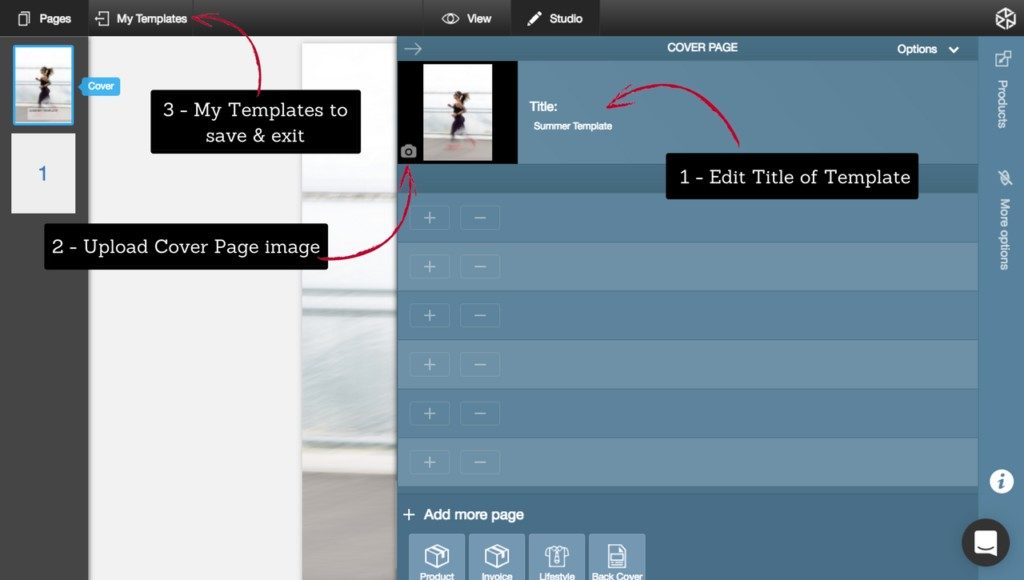
• Edit the Title of your Template for future use
• Upload image for your Cover Page by clicking on Change Image icon
• Use drag & drop editing to customize your Invoice Template – change messaging, text, colors, fonts
• When you’ve completed customizing your Template, click My Templates at the top left (your Template will be saved in the cloud)
 [/vc_column_text][/vc_tta_section][vc_tta_section i_icon_fontawesome=”fa fa-check-square-o” title=”How do I set my Custom Template as the Default Template?” tab_id=”1493844476919-4c558b0f-f161″ add_icon=”true”][vc_column_text]• From your Dashboard, choose Zinevoice > Invoices from the left menu, then choose Templates at the top right
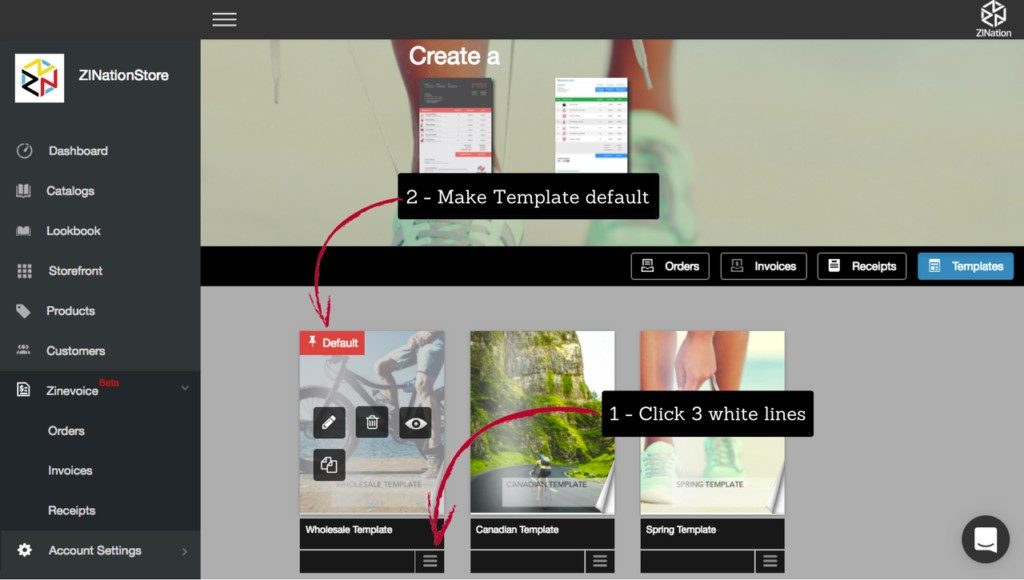
• Click on the 3 white lines in the bottom right corner of your Custom Template thumbnail then click on the red Default icon – this Template is now the Default Template for Invoices you send
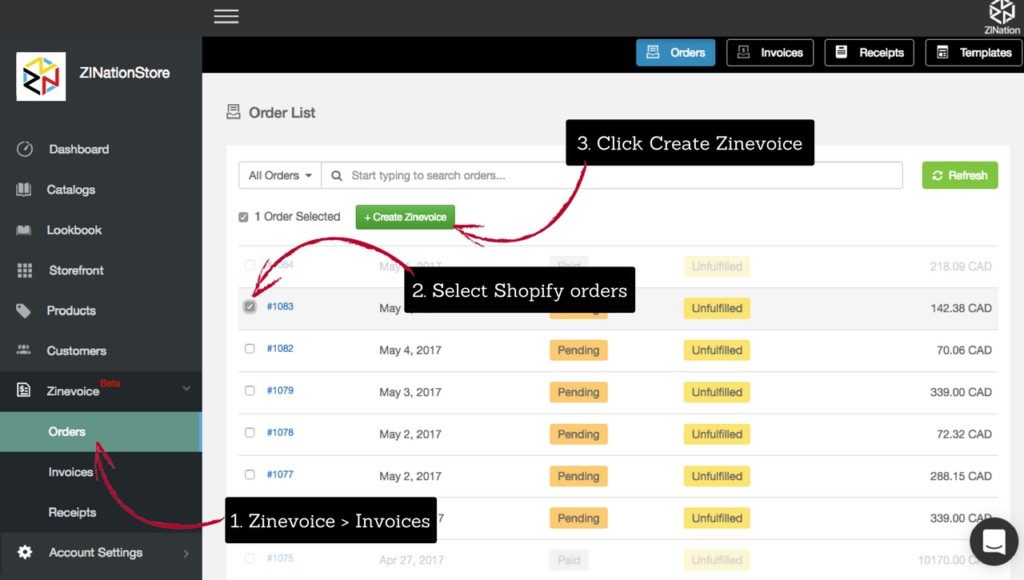
 [/vc_column_text][/vc_tta_section][vc_tta_section i_icon_fontawesome=”fa fa-credit-card-alt” title=”How do I create an invoice on demand from one of my Shopify orders?” tab_id=”1493834701263-c39f771d-be61″ add_icon=”true”][vc_column_text]• From your Dashboard, choose Zinevoice > Orders from the left menu
• Select which Shopify order(s) you would like to create an invoice for – you can select multiple orders
• Click Create Zinevoice
• If you are happy with the way your Invoice looks, click Send Invoice or make any edits you require to this invoice before sending (edits you make to this invoice will not impact this Custom Template for future orders)
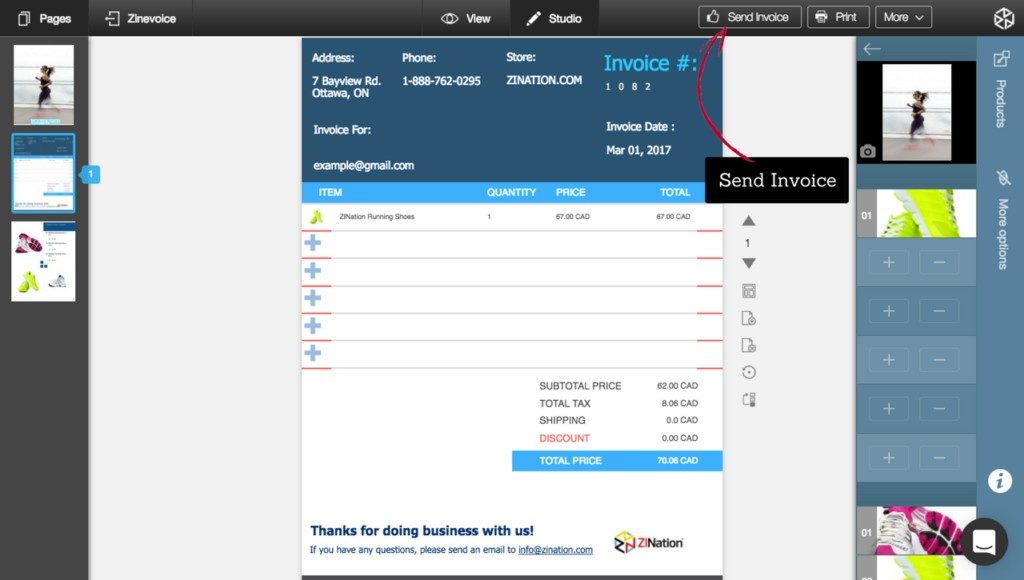
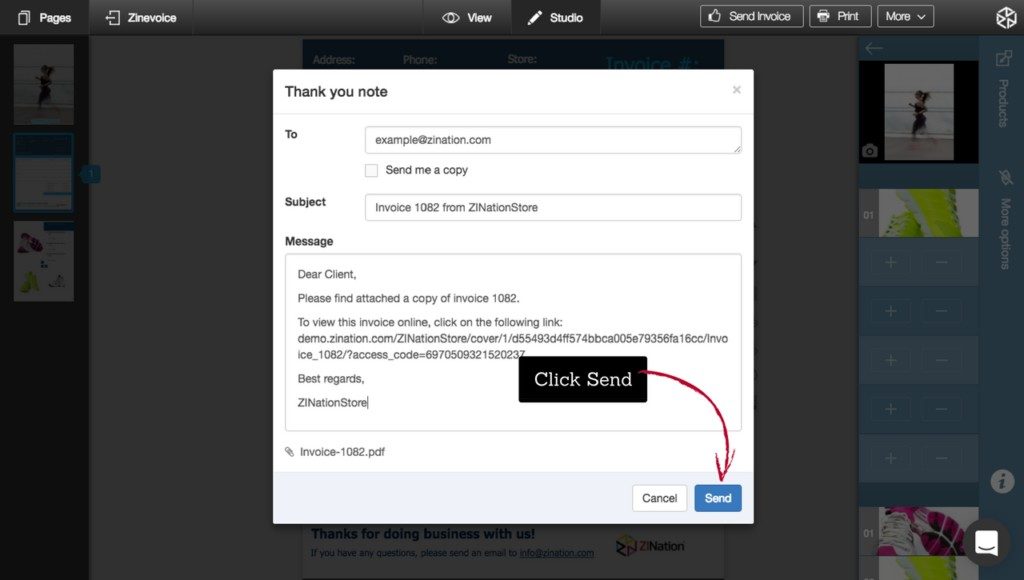
• Make any adjustments you require to the Message that your customers will see in the email they receive and click Send
 [/vc_column_text][/vc_tta_section][vc_tta_section i_icon_fontawesome=”fa fa-cogs” title=”How do I set up my invoices to go out automatically for Shopify orders” tab_id=”1496248405963-38789bb7-1fc3″ add_icon=”true”][vc_column_text]• From your Dashboard, choose Zinevoice > Invoices
• Click on Automation in the top right
• Choose when you would like to automatically attach invoice to Shopify email: when an order is Created, Paid or Fulfilled

• Follow steps 1 through 4 to create and insert your PDF Invoice download link into the Shopify Notification email of your choice
5
• Click Save before going to Shopify Settings -> Notifcations

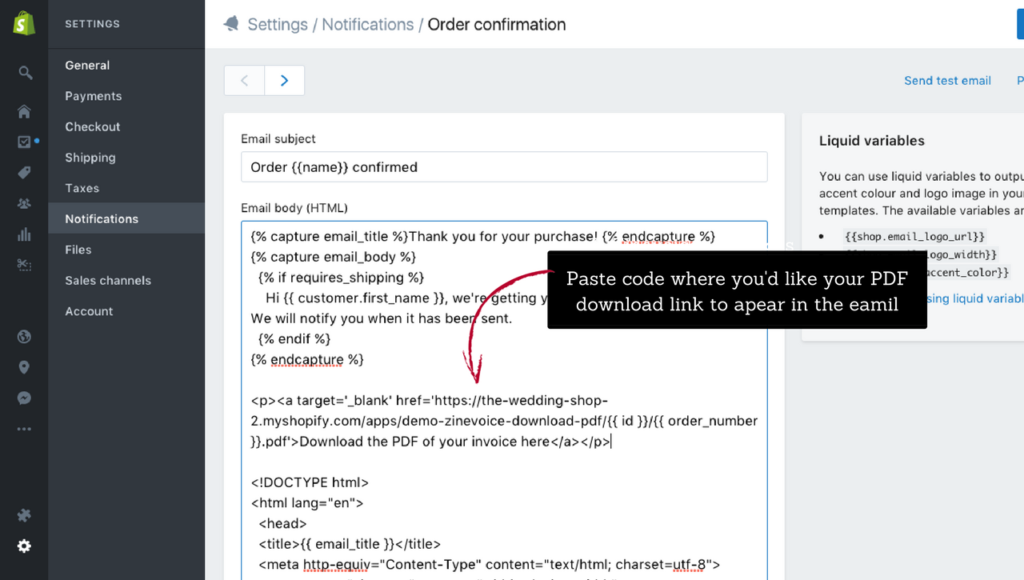
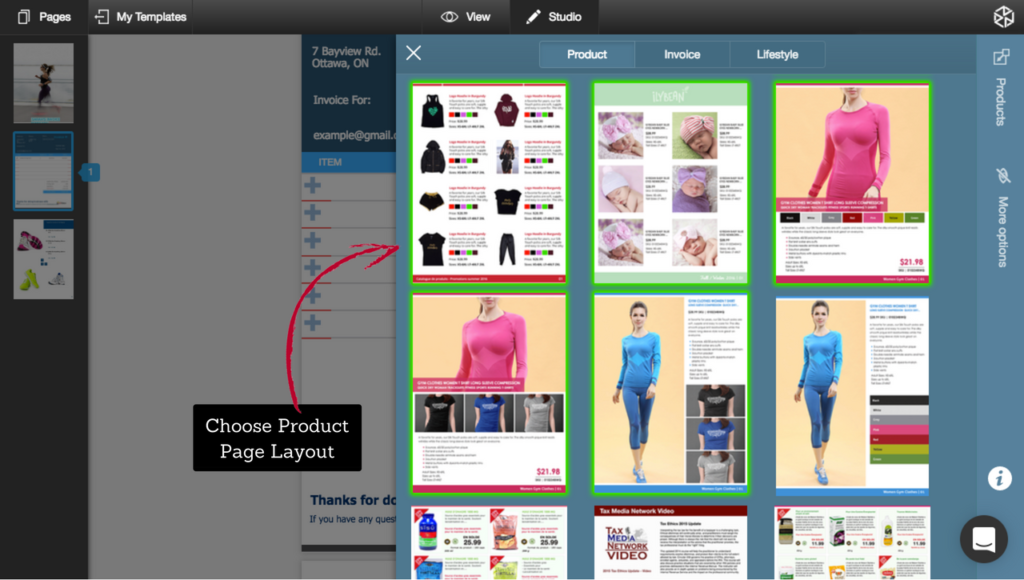
Click Save after pasting the code[/vc_column_text][/vc_tta_section][vc_tta_section i_icon_fontawesome=”fa fa-cart-plus” title=”How do I include recommended products in my Invoice Template?” tab_id=”1493996178683-cbdf05a7-6abd” add_icon=”true”][vc_column_text]• When customizing a Template, add a product page after your Invoice page by clicking on the Add a New Page icon
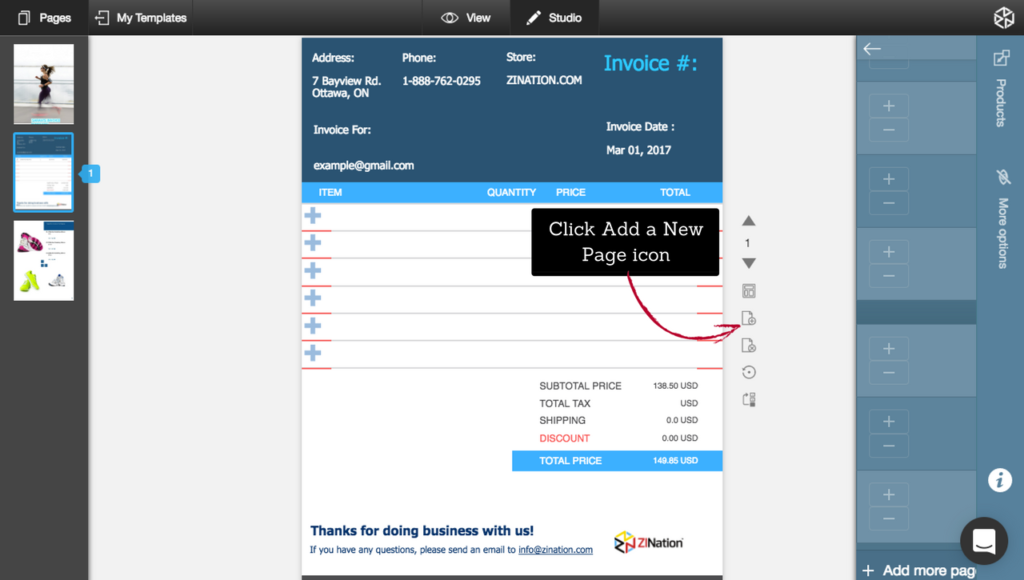
• Choose a Product Page Layout to use for your recommended products
• Add recommended products by clicking on the plus signs and choosing products from your Product Information Management system
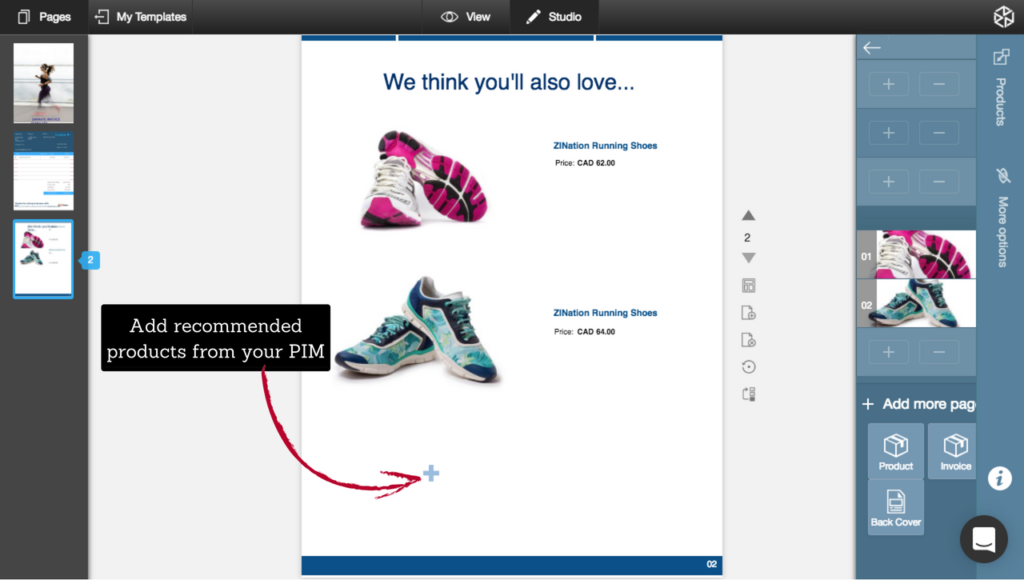
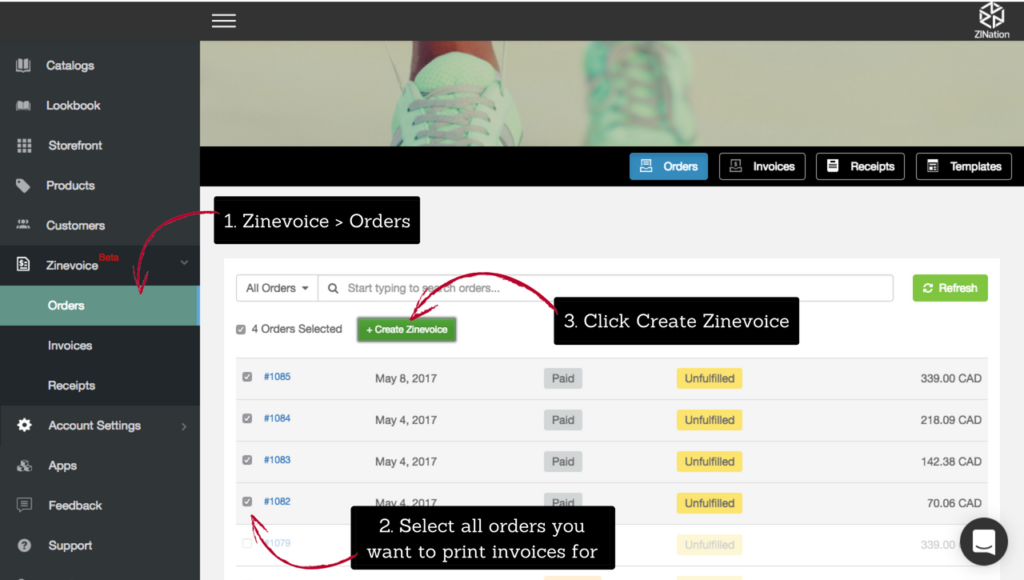
• The products you add will always be included when you use this Custom Template to send an invoice to a customer[/vc_column_text][/vc_tta_section][vc_tta_section i_icon_fontawesome=”fa fa-print” title=”How do I do Bulk Invoice printing?” tab_id=”1494273197086-a988d0b9-8919″ add_icon=”true”][vc_column_text]• From your Dashboard, choose Zinevoice > Orders from the left menu
• Select all the orders you would like to print invoices for
• Click Create Zinevoice
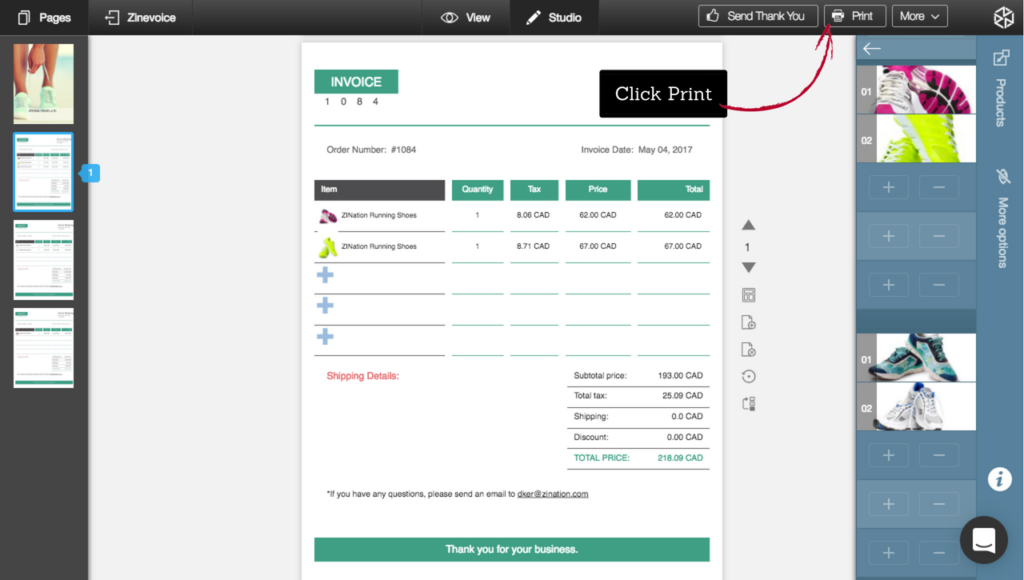
• Click Print
 [/vc_column_text][/vc_tta_section][vc_tta_section i_icon_fontawesome=”fa fa-trash-o” title=”How do I delete an element or text from an invoice template?” tab_id=”1497021626292-86eca852-19d4″ add_icon=”true”][vc_column_text]• When in Studio editing an invoice Template, drag any element or text off the page to remove it from your template
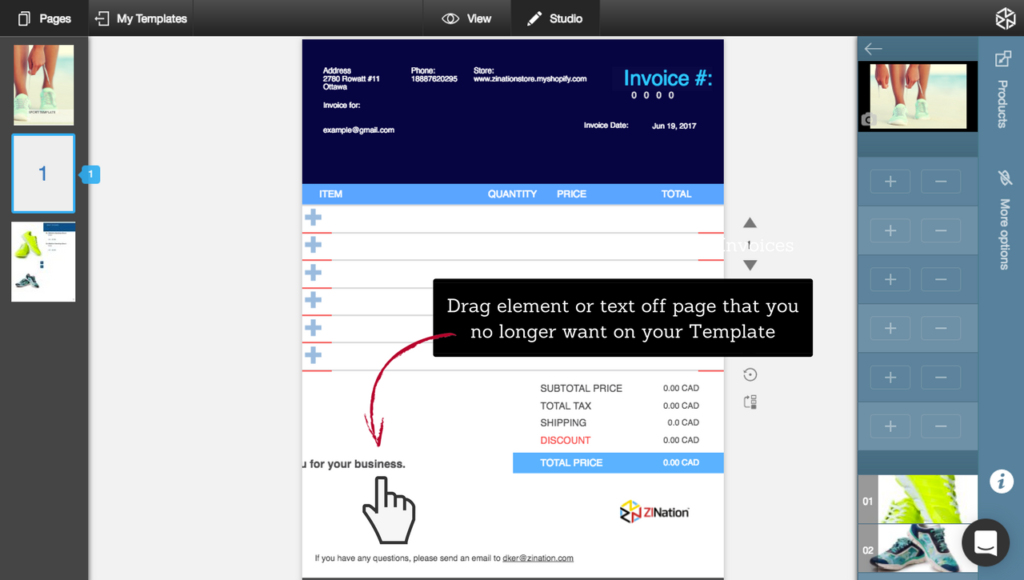
• Any changes you’ve made will be saved in the cloud, there is no need to save your work[/vc_column_text][/vc_tta_section][/vc_tta_accordion][/vc_column][/vc_row]